Saturday, September 25, 2010

Beautiful Distressed Paper Flowers

Bo Bunny posted a tutorial today on making these gorgeous "Water Distressed Blooms."  Be sure to check it out here!

Monday, September 20, 2010

Back to School Layout

I had two purposes for creating this layout:
  1. I never know what to do with the kids' school portraits when it's time to replace them the next year.
  2. If your kids are like mine, you always have a plethora of school papers waiting for a home. 
So I decided to create this page to solve both of those problems.

I made a large pocket using a die cut paper to hold progress reports, newsletters, etc.  The 2nd page showcases Cam's spring portrait.  This layout is something that can be added to as the school year passes.
  
As you may have figured out by now, I love adding little details like the button and string.  A project just isn't complete without them!


This layout is for a class I'm teaching this week for Lucky Lark Designs.  If you are interested in any kits, just send an email to orders@luckylarkdesigns.com.  If you can't attend the class, you have the option of purchasing a completed kit, which means all the stamping, punching, and die cutting is done for you.  All you have to do is assemble the pieces.  Easy Peasy!

Sunday, September 5, 2010

Crepe Paper Flower Tutorial

As promised, here is the tutorial for making the crepe paper flowers I used on the layout I posted about yesterday.


I purchased a package of crepe paper that came in a big sheet (8 ft x 20 in).  I found it in the same section of the store where the tissue paper and gift bags were.

Start with a strip that measures 4" x 20": 

Fold it in half:

Then fold again into thirds:

 This is what it looks like folded into thirds and lying flat:

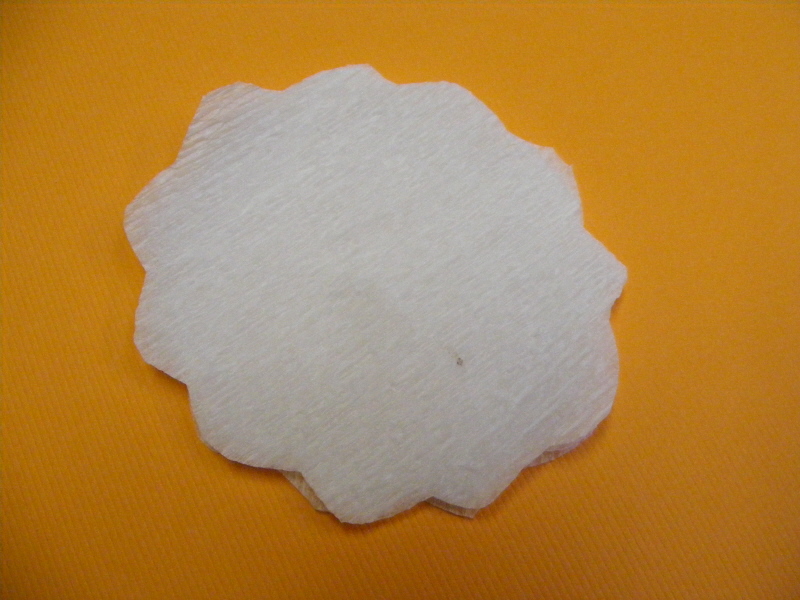
Cut all the layers into a circle.  I didn't measure (can you tell?) but it's OK...they don't need to be perfect:

When you are done, you will have 6 circles.  (Keep them together in a stack, though).

You can leave them in a circle, or cut a scalloped edge.  Again, I just free-handed the scallops:
Punch a 1" circle from cardstock.  Add a dab of hot glue or a strong liquid glue (like Diamond Glaze).  If you use hot glue, work quickly:
Gather the flower up:


Snip off the bottom:


Press the cut end of the flower into the glue.  Let dry:

Spread the layers out and fluff them:

If you want to add a touch of color, sponge a little bit of pigment ink onto the edges of the flower:

Done!

Here's a tip:  Don't use a spray mist to color your crepe paper flower.  The water content will take the crinkles out of the crepe paper and make a big mess!  It might work on tissue paper, though, but I haven't tried it.

Speaking of tissue paper, here are some similar flowers my Mom helped the kids make this summer.  She cut circles from colored tissue paper.  Instead of gluing them to a base, she poked a hole in the center and threaded a pipe cleaner through.  She folded the tip of the pipe cleaner over to keep all the layers into place and covered that up by fluffing the tissue paper in the center.
 
Don't they look pretty?  I love the different colored layers the boys created.  See what you could do on a layout or card? 

Saturday, September 4, 2010

My Class Layout

 Here is my layout for my upcoming scrapbooking class through Lucky Lark Designs.

I needed a quick family photo one day for a project I was working on.  So we set the timer and headed down our little country lane.  I love how it turned out and decided to use it on this layout as well.


I created the background by laying a paper doily onto white cardstock and spritzing it with Radiant Rain Mist.  Then I removed the doily.  (It still looks like it's there, doesn't it??)  I love the look this created!

I tied some hemp string around these side tags for a little added texture.


I don't normally mix this many manufacturers together, but I really liked it on this layout.  (Creative Imaginations, Cosmo Cricket, Pebbles Inc.).

Do you like my new QuicKutz flower dies?  I love them!!  (Travis said they looked like weeds.  LOL!)

This crepe paper flower was pretty easy to make and, I think, adds the perfect touch.  Once it's inside a sheet protector, it does get a little smooshed, but it still looks pretty!  I will post a tutorial tomorrow.

If you are in the area, please stop by our class next Thursday night!  Details are on the Lucky Lark Designs blog.