
Day 3 of Jessica Sprague's class was awesome! I am amazed how easy it is to learn from her. I would really encourage anyone who is interested to take a class from her. She offers a wide variety of them from photo editing to digital scrapbooking. Just click here to see what's available.
Now here's my show and tell for Lesson 3--Creating a Vintage, Hand Tinted Look.
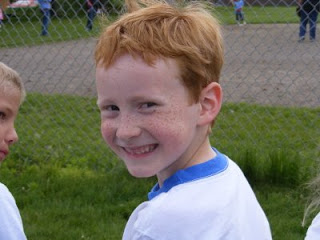
This baseball picture of Cam was the first one I tried. Here's before...
Now here's my show and tell for Lesson 3--Creating a Vintage, Hand Tinted Look.
This baseball picture of Cam was the first one I tried. Here's before...

and here's after...
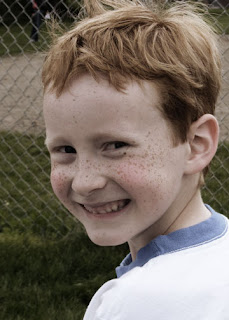 Isn't that so cool! The only hand-tinting on this photo was adding some color to his cheeks. The other changes were all done by adjusting the Hue/Saturation. I also learned how to work with Adjustment Layers.
Here's a black and white photo before...
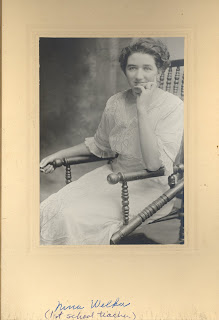
and after...
 I did way more hand-tinting on this photo. I tried to keep it subtle, so hopefully you can tell that I tinted her dress green, and added some color to her eyes, lips, and cheeks. Jessica is also great about giving us free downloads such as the black frame. Then she challenged us to add some tiny stars in the background. I'm not sure the stars go with the heritage look, but they are there anyway! :)
Here's the last one I did... before...
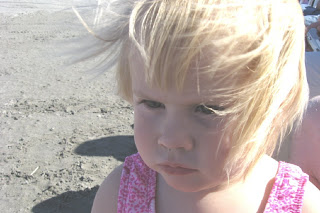
and after...
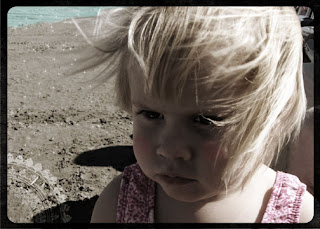 This one turned out pretty dark. I maybe should have worked a little more on the shadow on her face. I had to add some of the white back in her eyes because they turned completely dark. I also added blue water where there really is just sand and again tinted her cheeks. Next I stamped with a brush in the lower left corner. Then I added Jessica's black frame and some tiny stars.
This class is so much fun! It's so nice to learn what all these functions in Photoshop do. I don't think I'll ever be able to scrap a plain old picture again!


No comments:
Post a Comment