Friday, June 26, 2009

Scrapbooking Family History

I love creating heritage pages although sometimes they can be a challenge. I try to find ways to make a layout beautiful as well as record family history. Sometimes there's not a lot of information about a certain person or photo, but I can usually glean little bits here and there.

Patterned Paper: Bo Bunny; Stamps: Inque Boutique; Glimmer Mist: Tattered Angels; Flowers: Bazzill, Prima; Pin: Making Memories; Ribbon: Bazzill

I made this layout for a class I taught at Porter's last night. My great-grandparents are in the large photo in the center. Then the smaller photos are of them and their children...when they are young and then years later. I made a family chart down the left side of the layout starting with my great-grandparents. I thought it was a great way to tie all the pictures together and also give the reader a quick visual of how everyone is related.

The butterfly was made by cutting a pattern from regular paper and attaching it to the layout with temporary adhesive. Then I sprayed Glimmer Mist over that area. After it dried, I removed the mask and there you have it...a beautiful, shimmery accent!

I have a couple of kits left over from class. If anyone is interested, let me know!

Wednesday, June 24, 2009

FREE Photo Editing Class by Jessica Sprague!

Lookie what I just discovered today! I'm definitely going to be giving it a try! Click here to register.


Tuesday, June 23, 2009

Fancy Pants is in da House!!!


I have to admit, the best part about my job at the lss is getting to play with all the new products that come in. (It's a tough job, but somebody has to do it...right)?

The Kraft Kuts line from Fancy Pants arrived just in time for my weekend demo and I think I'm in love! Now I know that I say that about many products, but every once in awhile a collection comes along that completely inspires me. My head fills up with ideas and I feel like I could just keep cranking out the layouts until there's no more paper left. Well, that's how it was with this Fancy Pants collection. I managed to make five 1-page layouts this weekend...that's a record for me!

There's a collection for boys and one for girls, but when I saw them, I realized there was so much potential. I don't think there's a theme you couldn't cover with this stuff (except maybe Christmas). Here's what I made:


Now don't laugh, because these picture are old! I think I was in Jr. High. We were having a party for my sister and acting really silly. But they made me think about all the fun we used to have together as a family (actually, we still do). So I decided to scrap about the overall feeling of happiness and love I remember growing up. The first photo is of my two younger brothers, my sister, and my sister's friend. The second photo is my dad, me, and my sister. And no, our house wasn't pink or purple...it was red. The pictures are just really faded (and maybe the house was a little bit too)!


Some of the sheets of paper were a little busy for me (like the owls). But I really liked it after cutting it into strips. It added a nice splash of color and they are super cute!


This was my first real attempt at editing a picture in Photoshop. I don't know how to do anything fancy, but I did manage to eliminate the hospital cords and whiteboard that was hanging on the wall. I think this photo of my in-laws and their new grandbaby is so sweet!


I LOVE using the shaped papers all by themselves as a background! I printed smaller photos (2 1/2 x 3 1/2) to fit more of them in the small space. This layout is about Cam's school play. He was Velveeta...so cute! I wrote the lines he memorized for the play on the little journaling spots. A simple pocket on the back of the layout makes a great place to store a copy of the program and a newspaper clipping.


This past school year, I decided to do something a little different with the kids' traditional first-day-of-school photos. I took pics of them coming home and documented what their thoughts about the first day were. Here's Taylor's:
  • Find out what's new with old friends.
  • Try not to be tardy for every class.
  • School lunch is still gross.
  • Too much to remember!
I really lucked out that there happened to be a #7 in the perfect spot of this patterned paper. I lightly traced a circle around it with a pencil. Then I used my sewing machine to stitch around the circle three or four times. It made a great, inexpensive accent and reinforced the "7th Grade" theme.

So there you have it. I could have made more, but I decided I should sleep a little too. For more fabulous ideas, visit the Fancy Pants Gallery.

Happy Scrapping!

Monday, June 22, 2009

Harry Potter and Heidi Swapp

Once again, Cam is missing his big brother and best playmate. Since Taylor's at scout camp for six days, this could possibly be the longest week of his little life.

When Cameron is bored, he likes to make things. Often those things revolve around characters in his favorite computer games. Harry Potter, Wizard 101, Club Penquin, and Toontown characters are all over the house. He's pretty creative.


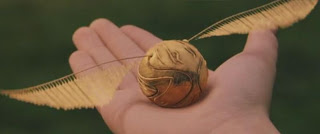
So today he decides he's going to make another Golden Snitch (think Harry Potter). He knows right where the Heidi Swapp wing stamps are because he uses them all the time...you can never have too many snitches after all. He wadded up a paper towel to make a ball and covered it with yellow construction paper. He stamped the wings and taped them on. Then he drew something (electricity???) all over the ball and declared it was the best snitch ever. Then he wanted to hang it from a doorway so he could fly through the air and catch it. Hmmm...we spent at least 30 minutes trying various ways to make this work without it ripping from the door jamb, but he finally gave up. I'm not sure how many violent leaps and snatches this snitch could take, but it still seems to be in one piece.


Stay tuned...I'm sure we will have an overabundance of Puffles, Fire Cats, and Doodles before the week is over!

Friday, June 19, 2009

Freebies!


Got Crafts? is a great resource for all things crafty. This website was created by Valerie Salmon and Janna Wilson. From sketches to free project downloads to classes, you are sure to find some inspiration. And we all like freebies, right? Check out this page! I especially love the fabric mini book.

Happy Crafting!

Thursday, June 18, 2009

Scrapbooking with the Kids

Yesterday, Cameron was bored. His brother had gone to a youth activity, so it was just me and Cam all day. We read, played games, did chores...and he was still bored. Anything I suggested, he didn't want to do. Finally, I asked him if he wanted to scrapbook with me. "Sure, I guess." he said.
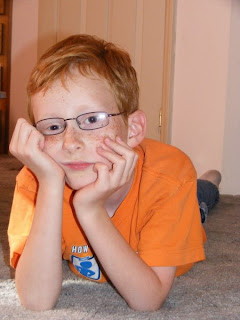


Now, I have to admit that scrapping with the kids isn't always that easy for me.
Problem #1: I'm a perfectionist. I really have a hard time stepping away and letting them do what they want.

Problem #2: One time, Cam was happy with slapping some pictures on a page and adding some doodles. But that was only one time (or maybe two...see the zoo pages below). Since he sees me scrapbooking almost everyday for assignments, he has decided he wants his pages to "look like Mom's." So here's some tricks I've learned to help the process along:
  • I let them choose the pictures they want to scrap. Then I pick a few papers and embellishments that match and let them decide what they want to use. The fewer choices, the better!
  • I find it easier for them to create a layout if they have a visual idea of what it could already look like. Usually we look through a magazine together until they see something they like. Then we scraplift.
  • I have to turn my head the other way when it's time to attach pictures and titles. They are most likely going to turn out crooked and I have to let it be OK. (Really...it's OK)!
  • I like to let the kids journal in their own handwriting. This makes the page that much more memorable in years to come.
  • Last night, Cam wanted me to attach everything to the page for him, but I tried to have him help me with as much of the layout as he could. For example, I lined up the stamp but he pressed down on it. When punching holes, I held the setter while he pounded with the hammer. (Ouch!) He applied the adhesive to the different elements and I attached them to the page.
  • Remember, kids always feel like it's their creation when they are involved in the process.

Here's what Cameron and I made last night:

He thought the flowers on this paper looked like the jungle, which went great with his jungle-themed birthday party.
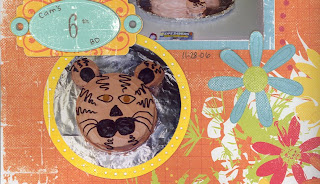
We punched holes in the round frame with a hammer and eyelet setter. (He only hit my thumb once)! He stamped the "6" on the tag and wrote his name and the date.
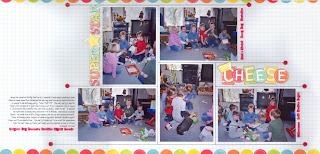

This was the 2nd layout of the night. It was a scraplift from a Sande Krieger layout in the July 2009 Scrapbooks Etc. Cameron soon lost interest and wanted me to finish it for him. The little circles are punched from patterned paper with a 1" circle punch, then cut in half. Very easy!


Cameron was very excited that I was going to show you his birthday layouts and wondered if we could show all of the ones he has made over the years. So here we go!

In case you couldn't tell, these are from his trip to the zoo:


This was his first year of baseball. He liked the doodling best.


Taylor is older and sort of a perfectionist in his own way. Here's some pages he has made over the past few years.
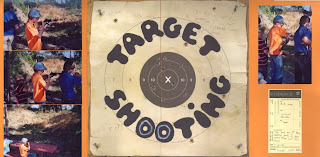
Shooting BB Guns at Cub Scout Camp


Taylor wrote all the journaling about his favorites at age 9.

Taylor loves using my old Coluzzle alphabets. It makes it easy for him to cut out a title by himself. He also did all the stamping.

This was one of the 1st pages he ever made. The dinosaur is an overlay we created on the computer with clipart and a blank transparency.
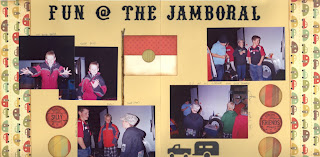
Taylor made this page all by himself.
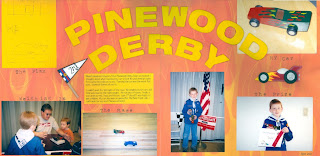
Taylor had drawn plans so his Dad would know how to cut out his derby car. We shrunk the image on the scanner and printed it out for his page.


Well, there you have it. Involving the kids in making their own scrapbooks can be a great boredom buster. And sometimes I have even learned some great design tricks from them!

Friday, June 5, 2009

Happy Anniversary to Us!

Today DH and I are celebrating 17 years of wedded bliss!

These three layouts are as far as I've gotten on my wedding album after all these years. I know, I know, but I've never been able to settle on that perfect classic look that I won't hate in 10 or 20 years. I have decided to just jump in and scrap with copies of my wedding photos. It's better than nothing at all, right?

The story of how we met.


Some of our engagement photos.


Finally hitched!


Have a great weekend everyone!

Thursday, June 4, 2009

Ahhh....Camping!

When we were growing up, our family vacations always consisted of a camping trip. Most of the time it was to locations right in Idaho and once in awhile, it was a little further away. As a kid, I loved to camp! (But then of course, it wasn't so much work if you weren't the parent). My dad, mom, sister, 2 brothers, and I would all pile in this white Ford pickup and head off to adventures unknown.

All products are from Cosmo Cricket's Mr. Campy collection.

(If you want to read the journaling for The Great Outdoors layout, click here. We had some great times!)

I think I must have turned into a girly girl somewhere along the line. Now that I'm the grown up, I have different ideas of camping...

Patterned papers, stickers and blackboard from Cosmo Cricket's Mr. Campy collection. Font is BD Northern.


My hubby came from a family of expert campers and backpackers. He was definitely born into the wrong family! I don't think he ever enjoyed it much. Here's proof:

I don't know how long this camping trip had been, but it looks to me like he was ready to be home. I think he's going to be sick...

Of course, he must have enjoyed it at some point, cuz look at this little cutie! There's nothing like campfire cooking...I will admit that! This picture was taken when he was six:

All papers and blackboard are from Cosmo Cricket's Mr. Campy collection. Based on a sketch in the Autumn Leaves Designing With 2008 Calendar.

What prompted this camping post, was a message I received from a fellow pea at Two Peas in a Bucket. Jean has a great blog where she lists all kinds of tips and information about camping. She asked if she could feature my "Happy Camper" layout on her blog. I was very honored! You can see it here. Be sure to check out the rest of her blog. It's a gold mine of information! Thanks Jean!

In closing, I have to share one of my favorite camping photos of all time! My husband's grandmother loved to hike. She would gather as many people as she could and head off to a trail...any trail....it didn't matter which. She knew them all like the back of her hand. When she got tired, she would lie down while they had a lunch break and take a little nap. Talk about playing hard! If you can sleep on rocks, you must be tuckered out!

Patterned Papers by Chatterbox and Karen Foster. Metal embellishments from K&Co. Flowers from craft supply. I printed the quote onto twill.

Happy trails!

Wednesday, June 3, 2009

Glue Glider Pro

I just discovered a new adhesive that I really like!

I have never been a lover of dispensers...I can't ever seem to get the adhesive to go where I want it to. So I have always used the little squares with the blue tabs that you have to pull off. The blue tabs don't usually bother me unless I'm working on a mini album where it requires lots of adhesive...then they get annoying.

Enter the Glue Glider Pro with Perma Tac. We just received a shipment of these in at Porter's and I tried one out for the first time on Saturday. I was pleasantly surprised! It's way smaller than an ATG gun, therefore more likely to get packed into my bag for a crop. Plus it's not heavy or awkward to hold. The adhesive glides on smoothly and holds really well, even on chipboard. The thing I really like about the adhesive is that it is cut into small segments (1/16") so you can apply a little or a lot. It also rolls around curves easily. When you want to stop rolling, just lift up and it's done...no icky, stringy messes.

Another part I love is how easy it is to refill. There's no need to have an engineering degree to figure out which wheel to thread it onto next. Just slide the entire refill cartridge in and you're ready to go! With 40' of adhesive, you can do lots of scrapping before having to refill again.

The adhesive strip is 1/4" wide which works great for most projects. The one thing that bugs me a little is that the adhesive is closer towards the right side of the roller instead of the left. Since I'm right handed, I have to look from the top of the dispenser to see where I'm rolling instead of just easily seeing from the side. I'm sure with time I'll get used to this and it won't be an issue anymore.

Last, but not least, is the price. At $14.99 for the initial investment of the dispenser + adhesive, the Glue Glider Pro is lots less expensive than the ATG.

So how about it? Has anyone else tried it and if so, what do you think? Would you replace your ATG with the Glue Glider Pro? Let me know what you think!

Tuesday, June 2, 2009

New Collections from We R Memory Keepers

I got to play around with a couple of the newest collections from We R Memory Keepers this weekend at Porter's. My favorite of the two was "Grandma's Kitchen." I always seem to gravitate toward more muted colors, and this line fit right in. Buying the 12x12 paper pad is the cool way to go since it also includes glittered chipboard letters, colored alphabet stickers, and a sheet of glittered die cuts. I think it's a great deal!

When you tear a sheet of paper out of the pad, it has an extra white strip at the top with a hole in it for displaying. Well, I inadvertently cut the wrong end of the blue paper off and sort of had a little panic attack for a minute. Then I decided it looked kind of cool and decided to leave it as it was. Sometimes things like that happen, and I'm slowly learning to accept the little serendipity. :) I often like the "accident" better than what I had originally intended!

I had a few customers at the store ask me how I printed my journaling around the scalloped frame. Here's a little trick:
  • In Word, click on WordArt, type the text, and select the font you want.
  • After the text appears in your document, click once on the text to bring up the WordArt menu.
  • Choose the WordArt shape option. (This is the ABC icon on my computer).
  • Choose the circle shape (or any other shape you want). Now you can stretch the circle to any size you want.
  • After you have printed it onto the paper of your choice, use a circle cutter to cut out the inside of the frame. I traced the scallops on the outside using some Fancy Pants chipboard as a template.

Another cool feature of purchasing the 12x12 paper pad is the two 2-page layout ideas and instructions that are included. I turned one of the ideas into this single page layout to demonstrate how easily in can be customized to fit any number of photos.


The next collection I got to work with was "MVP." It's a great line that is unisex and would work great for any sport. I created this two-page layout for a class I'm teaching next week. Besides the double-sided papers, there are cute $1 stamps, WRMK signature designer snaps, layered chipboard stickers, and a coordinating journaling pad. Some of the papers are printed so they can be cut down into 6x6 squares, making it really easy to create a mini album for your little sports lover.

To see pics of this collection, click here. (You will need to scroll down a bit).

I fully intended on making some more sports pages today, but the kids had different ideas. Hopefully I will have some to show you in the next few days.