
This is my friend's oldest daughter, Ashley. Isn't she beautiful?


 Embellishments: Erica Hernandez "Feeling Bookish" from 2 Peas in a Bucket; Paper: Erica Hernandez "November 2010 Freebie"; Frame and Paint Swatch: Jessica Sprague; Textures: Flickr; Fonts: Adler and Karabine.
 Here's my 12x12 layout. The little quote says, "No matter the weather I'm glad we're together." I wanted to imitate all four seasons by using vertical strips of patterned papers across the top half of the layout. The swirl at the bottom is lots of fun and anchors the whole page. The little yellow heart is made from felt that is stapled into place. (Felt is my new favorite)!
 here's March...
 June...
 September...
 ...and December. (More felt!!) :)

 Surprisingly, this project was easy to make and only took a short amount of time. You can easily alter the look by using different papers and stickers or changing the mat and/or frame.
 I love how versatile banners can be. You can create some for holidays, birthdays, and other family celebrations. Here's a brief overview of how to make one:
 I discovered a super easy way to attach glitter to the die cut letters without making a big mess. First, die cut your letters from cardstock. Then, run them upside down through a Xyron sticker maker. This will attach adhesive to the front of the letter.
 Then sprinkle them with glitter and shake off the excess. It's as easy as can be and virtually mess free! (I loved the Martha Stewart glitter for this project).
 Attach the banner together with wire or ribbon. You can leave a little space in between each pennant for tying bits of lace and ribbon if desired. Attach part of a Christmas pick to each end and finish off with some more pretty ribbons.
 Bo Bunny's "Buttons and Bling" were perfect for creating this little tree embellishment. There were still plenty of buttons left over that I plan to use on some Christmas cards later.
 Happy Scrapping!
 The fort was shaped like a triangle which might be great for defending itself against attacks, but not so great when trying to build it out of popsicle sticks. We finally got it to work out and Taylor was happy with the results.
 Here's his Jamestown sign and the front gate.
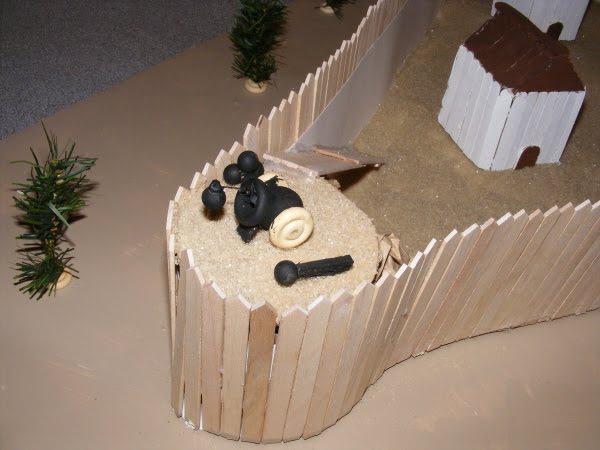 A close up of one of the cannons with a cannon ball shooting out of it. (He loved that part the best).
 Papers: Bo Bunny, Cosmo Cricket; Dies: QuicKutz
 This is a shot of the inside of the card before they wrote in it. It looked so cute when it was finished with all their little kid handwriting! We delivered it to our neighbor on Sunday since it was her birthday. She loved it!

 Papers: Pebbles; Dies: QuicKutz; Stamps: American Crafts, Hampton Art; Border Punch: Fiskars; Cork: QuicKutz; Other: felt, buttons, pins, ribbon.
 I love using this technique for printing wallet-sized photos as well. It's a real money saver and takes the guess work out of cropping manually. Give it a try!


 Also included in this collection is some cute foil tape in the shape of gears, 3-D stickers, glitter brads, acrylic $1 stamps, and matching textured cardstock. Cute, cute, cute!
 I used the 3-D stickers for my title and some of the embossed cardstock stickers to embellish throughout. The little bird, song notes, and journaling block were all created with the cute $1 stamps.
 To see more of this collection up close, click here and scroll down a little bit.


 I used the Tim Holtz chains to "hang" some of the photos from and to give the yellow monster something to dangle off of. I love all the different sizes of googly eyes too! It was a fun layout to make and has space for lots of photos or some more over sized monsters.
 Have you heard about the great new color matching tool offered by Scrapbook.com? It's a really great resource for choosing a color scheme for all your paper crafting projects. There are a few different options when using it.


